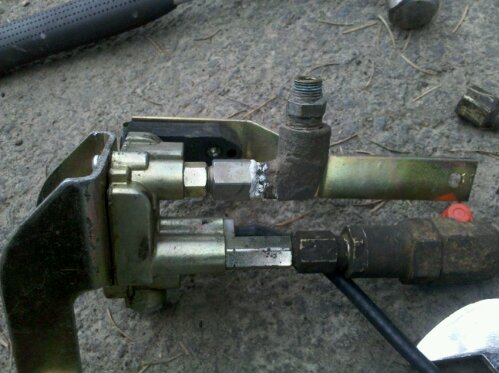
I recently got a good deal on some somewhat generic leveling valves for The Ghost off of E-Bay. They were both right valves, so I modified the bracket of one so it could be for the left side rear. For those not familiar, these are thevery small little devices that tell the fairly large air-bags in the suspension how high/low the body should be in relation to the axles. These valves exist to make up for changes in loads, leaks, and other oddities that would otherwise be present in a simpler suspension system.
From the bottom right (inlet), it passes through a filter, then through a check valve, then through two more screens before entering the valve. The black tube is an exhaust port (for letting air out of the bags…such as when a bunch of people disembark) and the elbow port goes out to the air-bags. The flat piece of steel in the background tied to the black plastic part is the arm that connects to the axle via link to sense its proximity in relation to the valve (and thus, body). Movement of this arm upwards (axle closer) means add more air and conversely, as the axle moves away, remove air from the suspension. There is a small bulb of viscous fluid at the bottom that dampens this effect so quick changes (like a pothole or bump in the road) don’t make massive suspension changes.

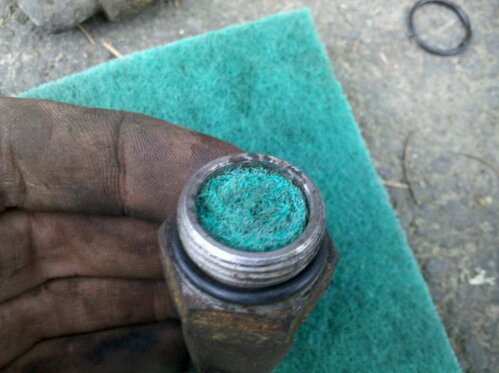
Upon rebuilding the plumbing that is specific to The Ghost attached to these valves, I found that the in-line filters had long failed (foam). Using a trick I learned with PCV plumbing on early water-cooled I4 VW’s, I wadded up some scotch brite type pad (rolled) and installed it into the space where the filter had been. The filter is to keep material out of the check valve and it works like a charm. I also cleaned/inspected the check valves that keep the air-bags from connecting to the main tank when the main tank is depressurized and the bags call for air. I also replaced some failing o-rings that were >50 years old.

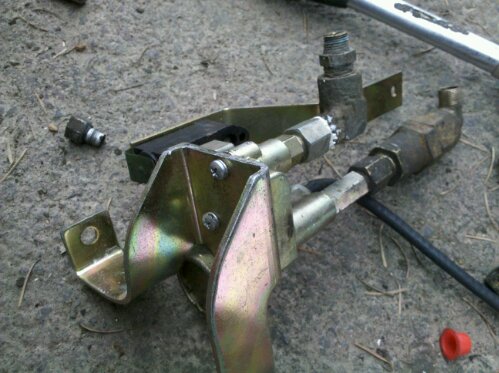
Here is another photo of a modified bracket for the drivers side valve. It currently is mounted with only one bolt, however the stiff copper lines and ease of valve action should keep it in place until I get near a welder and lengthen the valve mounting tab.

Unfortunately the passenger side valve started leaking the viscous fluid when I added air pressure so I will have to attempt to re-seal it or get it warrantied. Without the fluid, the coach would respond to movements as small as someone stepping in the door (and thus, burn up all the suspension tank air rather quickly). Wind can also do this too when these valves have failed into the quick reacting state.
The front valve check valve has stuck open however the leveling valve itself may be savable. I was unable to investigate because the suspension was so far collapsed in the front after me doing the service that I could not fit under the frame/skirting.
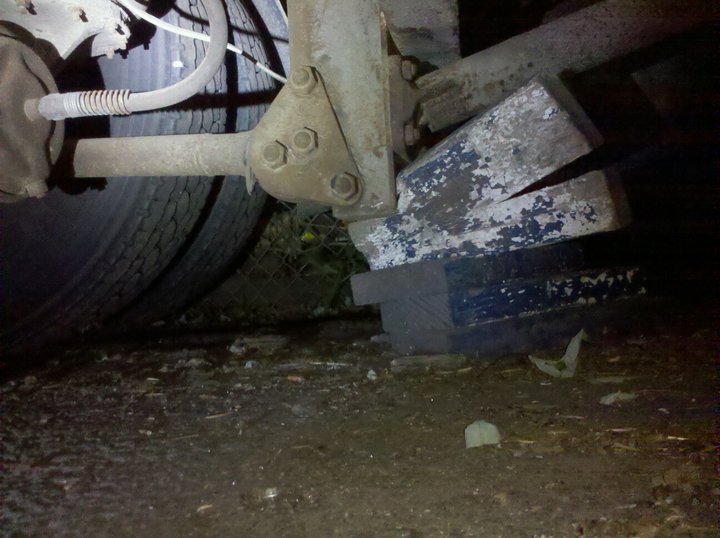
As a note, NEVER attempt work on an air-suspension system (or even go under a vehicle) unless the frame is supported adequately with a jack/stand/high density SOLID lumber. Here is a photo of an ‘experiment’ showing exactly what one side a mere 15,000lb rear end weight can do to some improper cribbing

