VS2-8 Repair Round TWO!

So, it broke again.

On our way back from Reno, NV (working after the 4th of Juplaya Trip), we lost overdrive just before Susanville. The feeling and the sound was the same. Large pow, and left with only 1st and 2nd gear. It was the middle of the night on a road that didn’t allow safely parking a 8ft wide 35ft long bus enough to have a look-see at what just happened. I did a visual, nothing was horribly wrong externally, so we continued on.

Fast forward to this week, I’ve been preparing to remove the transmission from The Ghost to determine the fault and drop in the replacement transmission! I recently acquired another VS2-8 from a gentlemen in Kelso, WA out of a Colorado (Mountain Metropolitan Transit) New Look T6H-4523A. The clutch packs look to be in sound shape (better than mine) and the internals were EXCEPTIONALLY clean. Assuming nothing alarming rear its head before installation, this will be the future transmission for The Ghost.

The reason I pursued an entirely new transmission was two fold. First, the parts to fix The Ghost’s VS2-8 (failed round two) are near impossible to find. Secondly, there may be a compound issue with low MAIN pressure on the transmission, which could be aggravating the lack of lubrication issue. Either way, I will be installing my sensors (two temperature sensors and one MAIN pressure sensor) along with the lock for 2nd gear (for descents with Jacobs brakes and climbing large hills).

To make this new transmission work, I will need to adjust the gear end-play from 0.250″ to .050″ or less. This large gap caused a bypassing of lubrication oil of the planetary gear driven plate…eventually leading to a failure of the bearings/bushings. I will be building a small spacer to insert into the transmission stackup to close this gap and hopefully solve the problem for good. This of course is the repercussions of installing a VS2-8 (designed for a deep bellhousing 8v71) on a 6-71 (with a shallow bellhousing) with dual spacer rings.

I also learned (by acquiring my VS2-8) that the factory setup on a 8v71 uses about 1/2 to 2/3 the number of bolts to hold the transmission to the engine that I am using in my setup, WITHOUT a external support on the end of the transmission. I have already built a support (using a motor mount rubber for a Kennworth tractor) so this should be plenty of support to keep the transmission attached to the engine.

Outside of adding this spacer, and re-installing with the new transmission, things should go rather smoothly. I recovered all of my old (undamaged) fluid so I could put it into the new transmission. This is similar to the fluid required for wet clutch driven heavy equipment (like bulldozers).

Over the next few days I should have the spacer built and be back to re-installation. Hopefully everything is ready for a shakedown run to NorthWestMogFest 2012 then shortly after down to BurningMan 2012!

Thanks for checking in!

Exhaust Upgrade

Something long overdue for work, mostly back-burnered because it wasn’t outright dragging on the ground, was the existing exhaust system. The stock dual 3 into 1 manifolds with matching  <3″ piped canisters + flexible rusty crushed pipe just wasn’t cutting it. The Ghost’s exhaust was quiet enough, but cruising down the highway I had a feeling the back-pressure was high and the restriction too much to let the engine stretch out. I sourced some 5″ exhaust components, installed an industrial 6 into 1 (4″) manifold, and built up a custom system.


The industrial manifold (which you usually see mounted upright) points down off the back of the cylinder head with the outlet pipe parallel to the engine block. I installed an immediate 4″ to 5″ adapter at the output flange. From there it travels downwards about 10″ and then bends (about 85 degrees from straight) towards the front of the bus. Usually there is a bulkhead here (aluminium) however I cut out a 8-9″ round hole to allow the pipe to pass through without touching or rubbing. It them immediately makes a turn to the drivers side of the coach, where it connects with the 5″ resonator and drops out close to the ground through a 5″ turn-down. I lightly sectioned a undercarriage panel (non structural) so that the turn-down fit nicely up into the body without hanging out the breeze (making the coach wider) or being even closer to the ground. The end result turned out excellent and shy of installing a few rubberized exhaust hangers, the setup is done. A slip-joint coupling was used at the pass-through of the bulkhead; everything else being welded solid. The flange obviously unbolts from the manifold as well.

The end result is a very aggressive high flow exhaust. There is room for improvement in the overall noise level department, but the note is acceptable and we’ll see how it sounds on a long run. A longer muffler can could be installed in place of the shorter one if needed. It definitely lets you know it is a 426cu in 2-stroke…rat rod style.


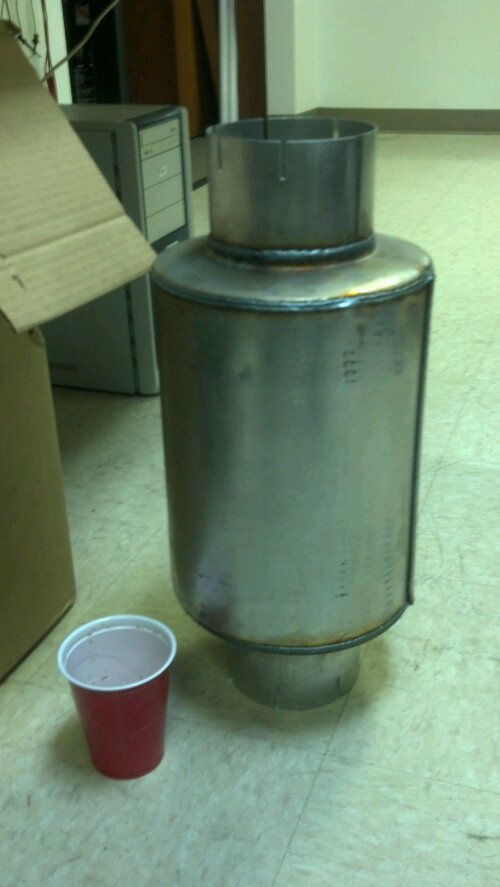
A size photo comparison of the purchased 5″ muffler.

image


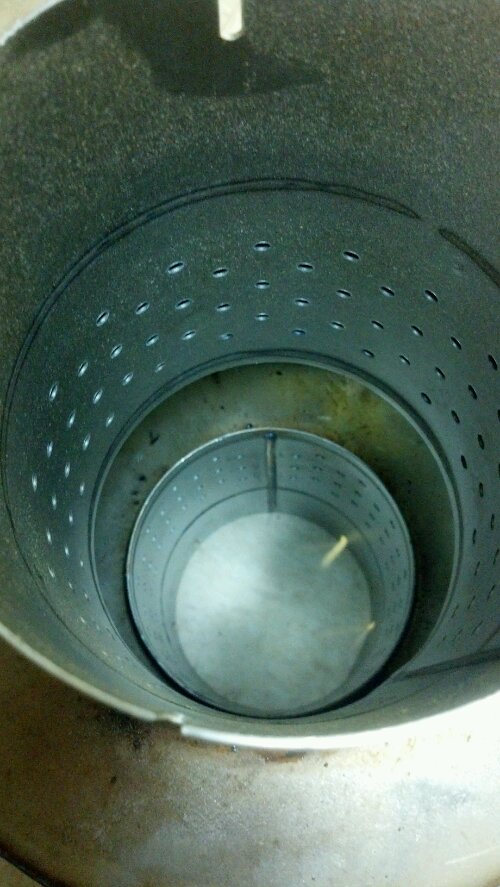
As you can see, it is a direct pass-through design with two resonant perforated sections at the inlet/outlet and a open area in the middle.

image


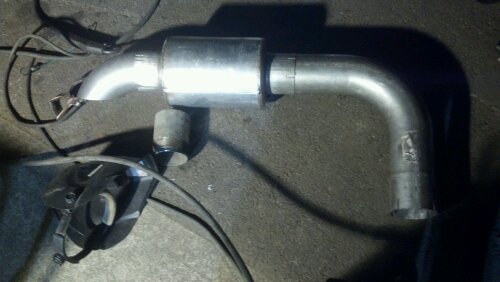
Here is a photo of the piece that connects (at the bulkhead) to the rest of the exhaust up to the engine.

image


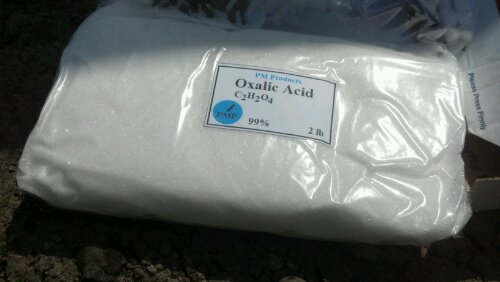
While I was doing this task, I took the opportunity to do an acid was on the cooling system. I had seen scale buildup evidence in my coolant buckets/samples so, figuring it hadn’t be done in quite some time, gave it a strong shock of Oxalic acid for a few runs up and down the road. I then drained, flushed multiple times, and re-filled with my coolant.

image


The handy trick for filling a horizontal radiator cap which is eye level from a 5-gal bucket. Funnel + flexible hose + bungee cord + forklift.

image


All in all a very productive Saturday. I took a break from the work for Mothers Day and will resume re-assembling the sheet metal back onto the rear of The Ghost so it can make it’s trip over to the new house Emily and I are closing on this week.


Until next time…

VS2-8 Transmission O/D Repair – Finished! & Powertrain Update

Well, it’s been multiple weekends and week nights working hard to get it fixed, but the VS2-8 transmission in The Ghost is now back to operational status.


A few short (<5mi) test drives were performed however with an unfinished exhaust system, things are a little too loud to be driving far. All three ‘gears’ were fully functioning and after topping off the transmission fluid (being careful not to overfill) shifts were firm.

There still remains the need for a microswitch on the throttle linkage to enable the soft down-shift solenoid for O/D to direct drive. I also want to fine-tune the shift point into O/D as currently the switch happens at about 40MPH and I would prefer it to be closer to 52MPH. I am also planning to install a small fluid/air transmission cooler and some valves for switching between O/D and Direct Drive (manual mode).

Another large hurtle overcome was getting the engine power up to rated output. Apparently making the timing adjustment as well as re-adjusting all injectors/exhaust valves with doing a full rack run/setup procedure really brought the power output up. The ‘new’ governor cover with shutdown lever that I had been fighting (and discovered was limiting fuel travel) had been adjusted to no longer interfere. With this fixed, the rack tuned normally and the idle, high speed, and full fuel adjustments were 10 times easier. Seat-of-the-pants power output feels considerably better than before. With overdrive fixed, MPG should improve as well.


The positive to negative ground conversion is going well. The generator and the regulator (stock) both operated properly once I re-polarized the generator with negative ground. The dash gauges indicated charging status and everything except the positive ground gauges I disconnected is still working. I still need to fabricate a dash, re-wire the heater coolant pump motor (swap wires), and install all the engine/transmission gauges/speedometer. It appears there will be 1 speedometer gauge + 8 aux gauges spots:

  • Speedometer (0-85MPH)
  • Engine Oil Pressure (0-80psi)
  • Engine Water Temperature (0-250F)
  • Fuel Level
  • Transmission Temperature (0-400F) – 2 senders
  • Transmission Pressure (0-150psi)
  • Air Pressure (dual needle, indicate tank + application)
  • Charge Current (stock for now)
  • 1 slot left for a 2nd air pressure gauge if I go dual circuit air brakes

This weekend the plan is to fit the 5″ exhaust + muffler and route properly through the bulkhead. a 4″ to 5″ adapter is used at the industrial manifold (4 bolt) then it travels down along block, turns forward towards the bulkhead, passes through (need to cut a large hole) and bends to meet the muffler (if it won’t fit before this) and then finally dumps on the drivers side just behind the rear wheel with a 5″ turn-down. Makes for a total of ~170 degrees of 5″ mandrel bend (minus turn-down). The muffler is a straight-through resonator (Walker 21835). It will be a little loud, however I did not have enough space for a full size can in 5″ and I’d rather have less restriction than quiet exhaust (30ft from the drivers seat). I may fashion some sort of adapter to install on (or in place of) the turn-down for on-playa use to prevent stirring up playa dust from exhaust flow.


Another time lapse video from last nights work:

http://youtu.be/sWGKtlHKt-g

A photo before I put the valve cover and corner support rod back on for final road test.

image

VS2-8 Transmission O/D Repair – Day 5 & 6

Another Update (with videos!)

The flyhweel, starter, generator, air compressor, transmission, cooling lines, and hydraulic lines are all re-installed and ready for leak checking. The engine compartment air system has had the fat trimmed off (old valves/gauges for the prior transmission) and the shutter-stat air oiler was re-mounted in a better location. The new single 4″ outlet exhaust manifold has been mounted and is awaiting exhaust pipe. The exhaust valve clearance and individual injector timing has been checked and set. Only a few of the injectors were off. After connecting some fuel lines and filling fluids, the engine will be ready for running the rack and final governor settings adjustments. I am also planning a oxalic acid flush of the cooling system to help reduce scale buildup in the block/radiator.

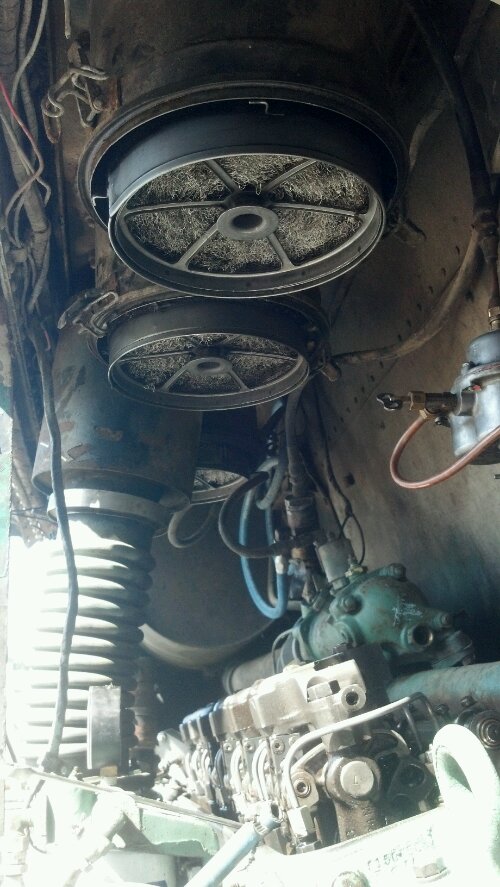
I also did some MUCH NEEDED service on the stock oil bath air filters. Apparently they had ingested a rat/mouse nest at some point while doing long drives. I had checked these filters when I first acquired The Ghost but deemed them reasonable.

Hopefully this evening (4/7/2012) I will at least have the engine running so that The Ghost can power around the parking lot without needing the forklift to push it out of the way of normal business activities on the property.

Some Time Lapse Videos:

The Ghost – Setting the Timing

The Ghost – 2012_05_05


Pictures:

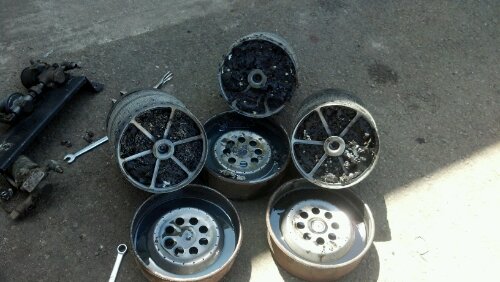
Here is a photo of the bottom of the air filter mesh canisters as well as the oil bath pans. Quite possibly the dirtiest filter I have ever seen…it is a wonder the engine ran.

image


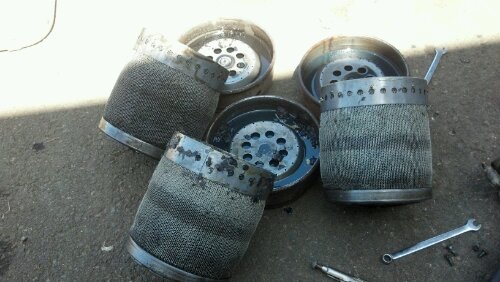
Here is another photo of the air filter sides (stainless steel mesh).

image


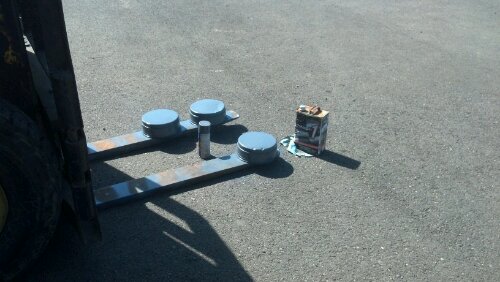
Putting a fresh coat of paint on the air filter oil bath canisters.

image


The mesh bags fit up into the body and then the oil basins go on the bottom.

image


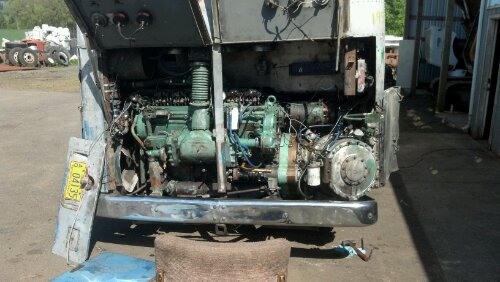
The transmission (and generator) installed. This was late morning Sunday before installing the air compressor and working on the valve/injector train/cooling system lines.
image


More to come soon!

Positive to Negative Ground Conversion Progress

The 120A generator, which will be installed pre-transmission, will be re-polarized in a hope to convert the bus to negative ground. It appears, through careful study of the dual field voltage regulator, that there are NO diodes or other current direction sensitive devices that require replacement of the regulator for negative ground operation. The starter for the engine, like most, is a field wound DC motor so reversing both the armature and the field windings results in same direction of rotation. Lighting systems, etc. do not care about which direction current flows. VDO instruments have been acquired to monitor the following:

  • Electronic Speedometer (0-85MPH)
  • Electric Engine Oil Pressure (0-80psi)
  • Electric Engine Coolant Temperature (0-250F)
  • Electric Transmission Oil Temperature (0-400F)
  • Electric Fuel Level
  • Electric Transmission Main Pressure (0-150psi)

The coach already has a gauge for showing charging/discharging and hopefully will continue to work (just with reversed what-is-what). The only loss to the whole project will be that I will sell my 12V +ground stewart warner fuel gauge that I got off ebay last year. All air pressure gauges are mechanical. A HUGE advantage will be that all negative ground device, like the stereo, CB, phone chargers, etc. no longer have to be ground isolated or use a converter. Also, my DSI water heater, which has a negative to ground bond that is very difficult to break and keep operating (the auto ignite sparker uses negative ground as a return path to the high voltage coil), will be able to be hooked up normally. All in all, a very reasonable setup for zero dollar cost (all gauges except engine oil temp were failed or had broken senders).