VS2-8 Transmission O/D Repair – Day 5 & 6

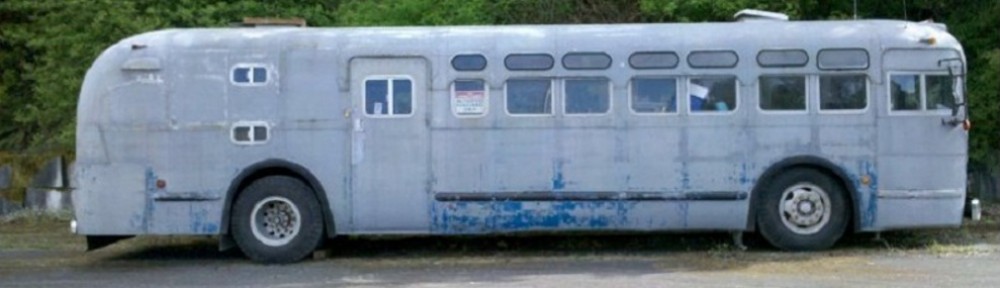
Another Update (with videos!)

The flyhweel, starter, generator, air compressor, transmission, cooling lines, and hydraulic lines are all re-installed and ready for leak checking. The engine compartment air system has had the fat trimmed off (old valves/gauges for the prior transmission) and the shutter-stat air oiler was re-mounted in a better location. The new single 4″ outlet exhaust manifold has been mounted and is awaiting exhaust pipe. The exhaust valve clearance and individual injector timing has been checked and set. Only a few of the injectors were off. After connecting some fuel lines and filling fluids, the engine will be ready for running the rack and final governor settings adjustments. I am also planning a oxalic acid flush of the cooling system to help reduce scale buildup in the block/radiator.

I also did some MUCH NEEDED service on the stock oil bath air filters. Apparently they had ingested a rat/mouse nest at some point while doing long drives. I had checked these filters when I first acquired The Ghost but deemed them reasonable.

Hopefully this evening (4/7/2012) I will at least have the engine running so that The Ghost can power around the parking lot without needing the forklift to push it out of the way of normal business activities on the property.

Some Time Lapse Videos:

The Ghost – Setting the Timing

The Ghost – 2012_05_05


Pictures:

Here is a photo of the bottom of the air filter mesh canisters as well as the oil bath pans. Quite possibly the dirtiest filter I have ever seen…it is a wonder the engine ran.

image


Here is another photo of the air filter sides (stainless steel mesh).

image


Putting a fresh coat of paint on the air filter oil bath canisters.

image


The mesh bags fit up into the body and then the oil basins go on the bottom.

image


The transmission (and generator) installed. This was late morning Sunday before installing the air compressor and working on the valve/injector train/cooling system lines.
image


More to come soon!

Counter Edge Completed

Mid January Emily, Mike O., and myself milled some poplar pieces I got from Home Despot on the router table to make counter edge material. I wanted something fairly hard, would wear, and that complimented the black surface (cheap was important too). I also  needed to source a relatively cheap miter box to cut the angles accurately for nice finish. I ended up purchasing one from Lowes (similar available on Amazon, etc.)

The poplar was notched (as seen below), adhesive applied, and air-nailed to the edge of the countertop material (MDF + laminate top). Normal home countertops do not have this feature because they often are not mobile with items sliding around on the top. This is a common feature in boats where ‘level’ might be a relative term. I installed something very similar to this in my VW Camper “Zesty” (Oak) and it has performed quite well.

Fairly easy, and after some basic treatment to prevent moisture damage, it should look really nice (ash trails in the grain).

image

image

image

image


All in all, ended up looking pretty good. A little sanding on the corners to knock off the dangerously sharp 90 degree edges and it should be good. As a warning, always point your nail gun down, and aim for the bottom half of the MDF when shooting nails into the counter edge. This bit me on the VW, and even here one lifted the surface and produced a crack. Easy repair but annoying as any amount of water that enters over the years will swell the MDF and cause problems.

Bedroom Door Progress

Update!

Worked on the bedroom sliding door cutout. This space is required to allow the door to clear the side of the body (height of the door maximized so in the open setting it just clears the curve of the exterior + insulation).

The cutout unfortunately was at an odd angle, but a metal blade made quick work of the aluminium.

Next step is to insulate and apply skin to the door and install the sliding hardware. I am working on a lock design since the rear bedroom/desk/bathroom space is for private use, and the front more for event volunteers when we are running events.

The frame is aluminium 1″ medium wall box tube TIG welded rectangle.

image

More to come soon!

Closet Installation Beginning

Tonight while I was working on the front seating areas, Emily was in the back clearing out the clutter and vacuuming/preparing the bed for our coming camp-out. As a tribute to her efforts, we mounted the first two rails of the three rail closet system. This area will have a fixed top shelf and many lower shelf/drawer combinations for storing clothes. The only trick will be designing the retaining system for when underway.

Fairly impressive drawer setup (mirrors racking used industrially/in supermarkets) for strength and simplicity. I only installed one screw per rail into the bus subframe and this was adequate to support multiple drawers full of material. Once I get another few attachment points per rail into the frame things will really be bulletproof.

We decided on open-air storage for clothing for ease of interior transportation, effective use of space, visibility, incoming window lighting, and also ease of cleaning. All big considerations when doing mixed Pacific NW and Desert camping.

On the right of this will be a taller clothing storage area for suits/costumes/coats/etc. This of course is all inside the secure sleeping area (locking door to be built between the main cabin and the private bedroom/bathroom/workdesk.

Exciting times.image

The Ghost Update 1/25/2012

It’s that time again.

The past week things have really picked up on The Ghost build project. More [fake] wood flooring, framing in additional seating, and working on the dining area have been high on the list. Also been making progress on the various air system leaks and ordering parts to fix up all of the non-critical but very annoying issues with the running gear.

Things off the list:

  • Replaced left window wiper control after attempting repair. E-Bay score for cheap.
  • Sealed around front wheel arches w/ urethane sealer.
  • Removed last of old rubber flooring
  • Skinned last of old interior paneling and removed all old insulation
  • Insulated all walls behind dining area/seating areas/storage area (only kitchen walls, front right corner and curved roof parts remain to be insulated)
  • Flooring completed up to front seating area (including cutout for fuel level sender access)

Currently in progress:

  • Framing in front seating areas
  • Building raised dining room floor & installing seating/table
  • Finishing sealing & insulating on front curved corner (replace window)
  • Install flooring on dining seating area
  • Refueling fuel tank
  • Repairing overdrive spring
  • Re-tuning governor

Near term to-be-completed:

  • Put edging on kitchen counters
  • Build upper two drawers and prepare for shelving below (in kitchen area)
  • Cap off line causing small leak in old automatic brake regulator valve.
  • Replace air-bag leveling valve on left rear and front (if leaking)
  • Replace drivers-side mirror with new one like on passenger side (heated school bus mirrors)
  • Re-Gasket front windows
  • Install heating units (forward, mid, and aft)
  • Install hydronic heater & tank

Lots more I’m probably forgetting, but at least that gets you up to speed!


Most of this push is getting the coach nicely prepared for the WetWesties UnsuperBowl campout at Nehalem Bay State Park in Nehalem, OR. I’ve attended since 2007 and the past year brought The Ghost as a party/food/chill space for close friends and family.

Expect to see us there again!

Check back soon!